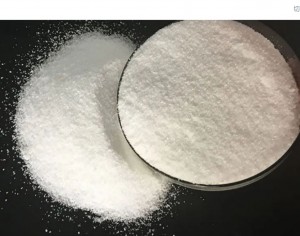
Surface preparation for polymerized white cement based putty
Surface preparation for polymerized white cement based putty
Surface preparation is a critical step in achieving a smooth and durable finish when applying polymerized white cement-based putty. Proper surface preparation ensures good adhesion, minimizes the risk of defects, and enhances the overall performance of the putty. Here’s a step-by-step guide on how to prepare the surface for applying polymerized white cement-based putty:

1. Cleaning the Surface:
- Begin by thoroughly cleaning the surface to remove dust, dirt, grease, and any other contaminants.
- Use a mild detergent or a suitable cleaning solution along with a sponge or soft cloth.
- Rinse the surface with clean water to remove any residue from the cleaning solution.
2. Repairing Surface Imperfections:
- Inspect the surface for cracks, holes, or other imperfections.
- Fill any cracks or holes with a suitable filler or patching compound. Allow it to dry completely.
- Sand the repaired areas to create a smooth and even surface.
3. Removing Loose or Flaking Material:
- Scrape off any loose or flaking paint, plaster, or old putty using a scraper or putty knife.
- For stubborn areas, consider using sandpaper to smooth the surface and remove loose particles.
4. Ensuring Surface Dryness:
- Ensure that the surface is completely dry before applying the polymerized white cement-based putty.
- If the surface is damp or prone to moisture, address the underlying cause and allow it to dry thoroughly.
5. Primer Application:
- Applying a primer is often recommended, especially on absorbent surfaces or new substrates.
- The primer enhances adhesion and promotes an even finish.
- Follow the manufacturer’s recommendations regarding the type of primer and application method.
6. Sanding the Surface:
- Use fine-grit sandpaper to lightly sand the surface.
- Sanding helps to create a textured surface, improving the adhesion of the putty.
- Wipe away the dust generated during sanding with a clean, dry cloth.
7. Masking and Protecting Adjacent Surfaces:
- Mask off and protect adjacent surfaces, such as window frames, doors, or other areas where you do not want the putty to adhere.
- Use painter’s tape and drop cloths to protect these areas.
8. Mixing the Polymerized White Cement-Based Putty:
- Follow the manufacturer’s instructions for mixing the polymerized white cement-based putty.
- Ensure that the mixture has a smooth and homogeneous consistency.
9. Application of Putty:
- Apply the putty using a putty knife or a suitable application tool.
- Work the putty into the surface, filling any imperfections and creating a smooth layer.
- Maintain an even thickness and avoid over-application.
10. Smoothing and Finishing:
- Once the putty is applied, use a wet sponge or a damp cloth to smooth the surface and achieve the desired finish.
- Follow any specific instructions provided by the putty manufacturer for finishing techniques.
11. Drying Time:
- Allow the polymerized white cement-based putty to dry according to the manufacturer’s recommended drying time.
- Avoid any activities that may disturb the putty during the drying process.
12. Sanding (Optional):
- After the putty has dried, you may choose to lightly sand the surface for an even smoother finish.
- Wipe away the dust with a clean, dry cloth.
13. Additional Coats (if needed):
- Depending on the desired finish and the product specifications, you may apply additional coats of the polymerized white cement-based putty.
- Follow the recommended drying time between coats.
14. Final Inspection:
- Inspect the finished surface for any defects or areas that may require touch-ups.
- Address any issues promptly before proceeding with painting or other finishing touches.
By following these steps, you can ensure a well-prepared surface for the application of polymerized white cement-based putty, resulting in a smooth, durable, and aesthetically pleasing finish. Always refer to the specific product guidelines provided by the manufacturer for the best results.